Composting is a great way to recycle and build a beautiful lush garden. Here is a quick inexpensive how to Compost Bin in Honor of Earth Day.
Earth Day is an annual event, celebrated on April 22, on which events are held worldwide to demonstrate support for environmental protection. It was first celebrated in 1970, and is now coordinated globally by the Earth Day Network, and celebrated in more than 192 countries each year.
One way to show support for our environment is composting instead of throwing it away.
I have 3 huge piles of compost in different stages that sit at the end of our property (on the opposite end of where my garden is). They are so big we use a tractor to flip them. Everything goes in these bad boys, grass, leaves, weeds, trimmings and I my chicken poo too.
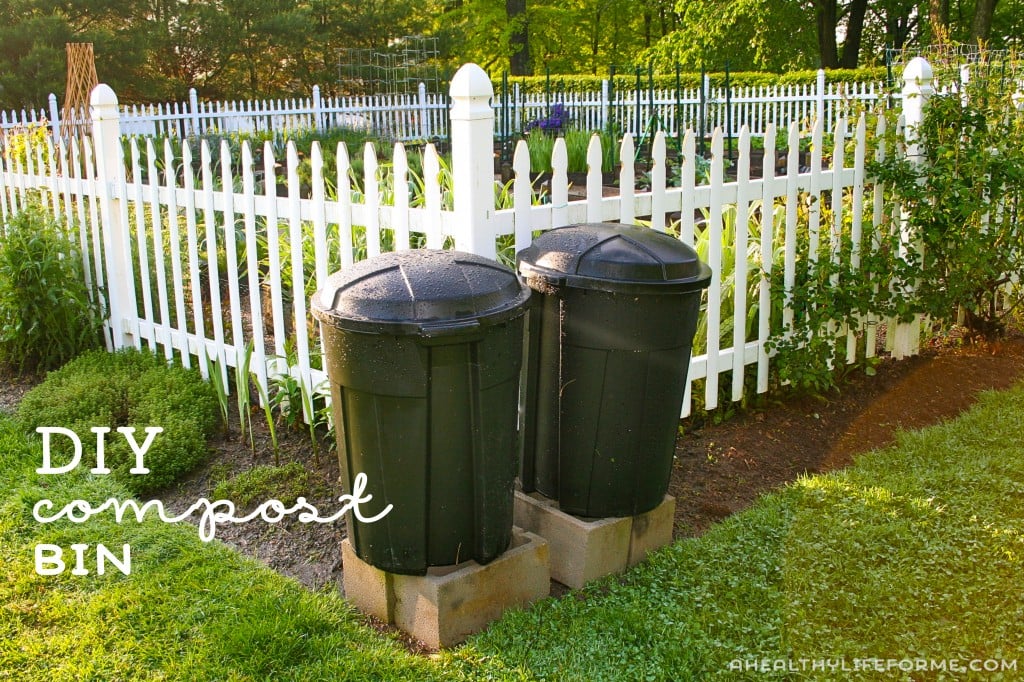
However, I wanted to try to keep a compost pile that was a bit cleaner simpler, and smaller closer to the garden that wasn’t an eye sore. I looked into the plastic black rotating bins that are sold at major retailers and the price range is around $200.00, which was more than I wanted to spend. I looked into what was needed to build my own and didn’t hesitate to run to the hardware store to pick up the supplies and get started.
What you Need:
I purchased two black (because I figured black would conduct more heat and break down the compost faster) plastic inexpensive trash cans with clamping lids. You want lids that clamp on because this will help when turning cans.
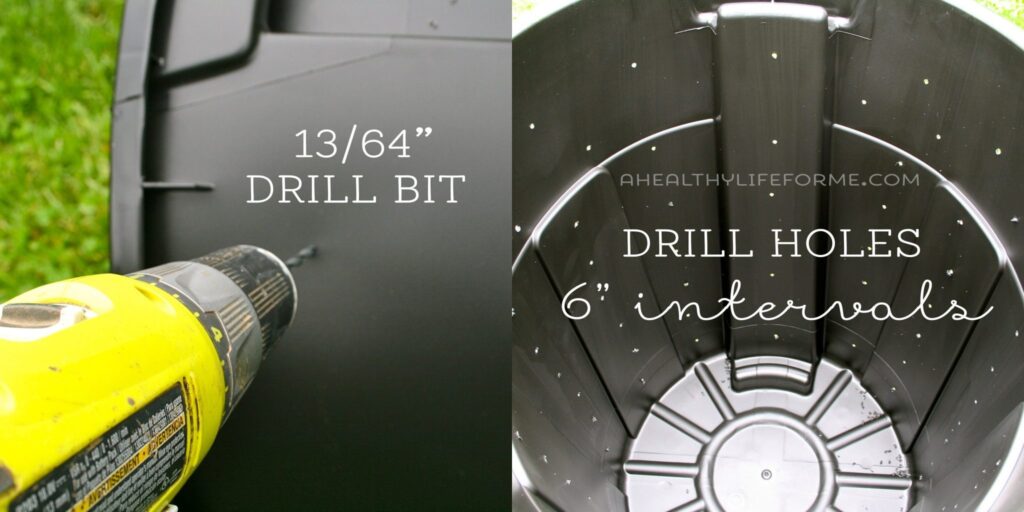
You will need a drill and a 13/64″ drill bit.
How To:
You will drill holes in a straight line from top to bottom at about 6″ intervals.
This took about 5 minutes for both cans.
The reason I am doing two cans is I figured one can compost while I work on filling the other.
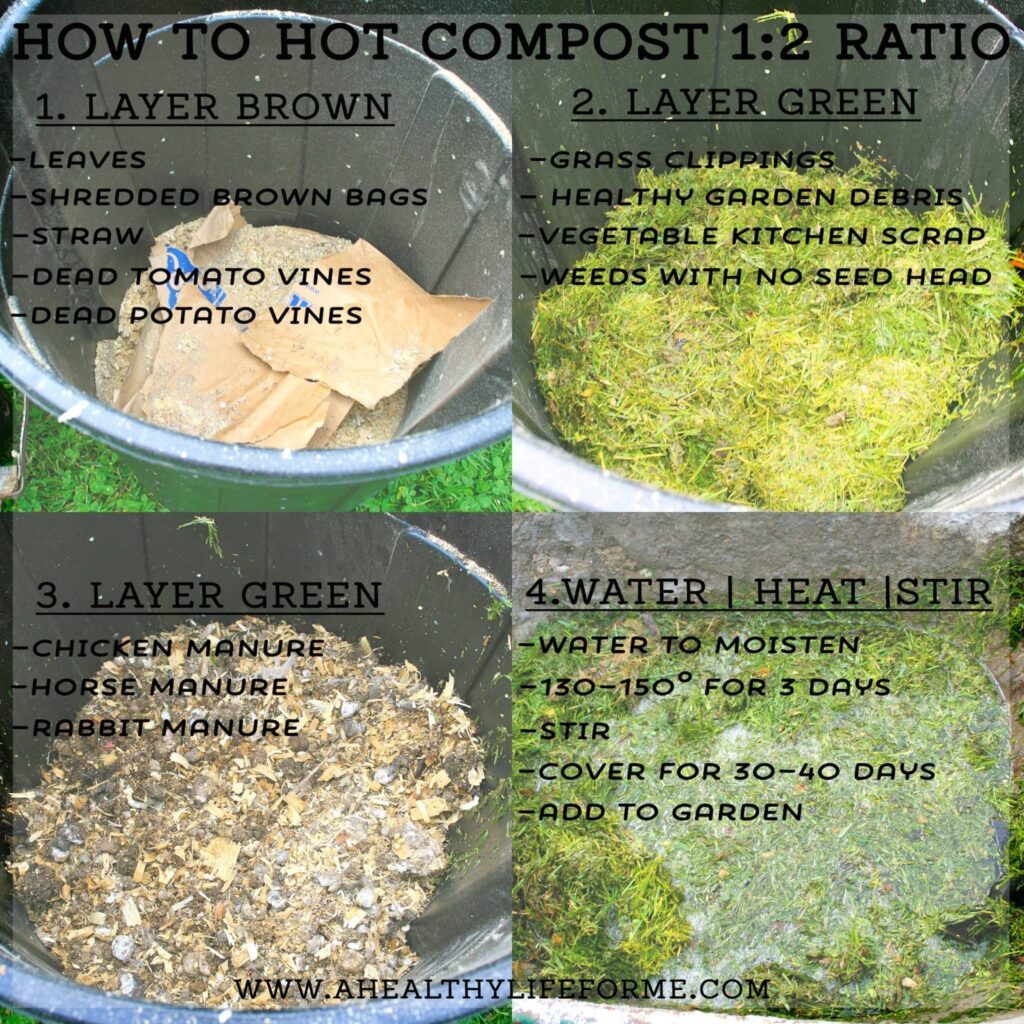
The rules to composting are simple no need to over complicate something that is so simple. A combination of 30 parts Carbon to 1 part Nitrogen creates the ideal environment for microbes to break down organic material to produce compost. In easy speak, that means 1 part brown to 2 parts green.
Combine the correct ratio of carbon and nitrogen to your bin and then add water to your material so that it is as wet as a well-wrung sponge. It is recommended that the compost pile heat to 130-150 degrees F and maintain that temperature for 3 days. Heating is necessary to destroy pathogens but temperatures above 160 degrees F can kill beneficial microorganisms and slow the process. To help you achieve appropriate temperature you can purchase a compost temperature gauge from a local nursery.
I placed two cinder blocks on the ground and placed the first completed bin on top and secured the lid. I even had a bit of material left over to start the second. The whole process took about 25 minutes.
Now once a week I will take a peek to make sure that the contents are staying moist and with some assistance. I’m keeping the cans right on the edge of my vegetable garden which sits right next to the chicken run. It is perfect for easy access and because of the color and the tidiness, they are not an eyesore.
In 30-40 Days I will have compost that I can add to the garden as needed. You can add the compost to your vegetable garden or flower bed by spreading it on the surface or by gently working it into existing soil.
I’m hoping that by the end of July I will have a can full of compost, with the second ready by the end of August.
Let me know if you build your own compost bin and any tips you have for making compost.









Hello Amy! Can you comment on the success you’ve had since posting this? I see often it is recommended that for hot composting you need a 4x4x4 area in order to get the mass to temp and decompose quickly. Have you had similar results with this smaller volume (fingers crossed)?
Hi Lisa, it does take more work and time to get to compost using this container. Of course a manufactured bin that you can spin manually will yield better results.
Hi do you have to flip these bins?